Saturday, July 23, 2016

Boiled, Not Baked.

This is a picture of my grandma.  Well, not really.  It's a picture of tiny-chubby-cheeks-me being held by my grandma while I blow on my favorite flower!  But this is the picture I always remember when I think of my grandma.  It was always on her dresser.  I actually took the exact picture from her dresser when she died and it now hangs on my wall.  


My dad is the one that got me interested in cooking, but he learned from the best - my grandma.  I mean . . . maybe.  In my mind, he helped her make dinner every night and stood by the stove with her teaching him about the different levels of boil - as she did me.  In actuality, my dad probably just ate all of her food and then got sad when he moved away to college, so he learned to cook.  Guess I could ask him!

Nonetheless, I'd like to imagine that her amazing cooking had something to do with the love of cooking/baking he passed down to me!

Boiled Cookies (yes, yes, you probably call them No Bakes) are so simple to make.  They only really require one nerve racking minute:  The chocolate mixture has to come to a "rolling boil" and must remain there for exactly 60 seconds.  No more and no less.  If you boil the mixture longer, the cookies are hard and inedible.  If you don't boil the mixture enough, the cookies are soft and you eat half of them with a spoon before throwing them away!  I sweetly remember many "spoon cookie" days with my grandma.  So err on the side of less cooked if you're worried about it because you can always spoon the awesome peanut butter chocolate oat goop into your mouth or onto some ice cream!!! Yum!

Generally I say use the highest quality ingredients possible, but sometimes I just use what is laying around the house or what my grandma used for nostalgia.  These boiled not baked cookies are the best I've ever had and I swear I'm not saying that because I'm biased!  Her boiled cookies are soft, smooth, and the perfect combination of peanut butter and chocolate.


I feel like I should put a disclaimer here: Do not do this at home.  Allowing two 5 year old boys to cook over a hot stove is dangerous.  DO NOT DO THIS!

That being said, teamwork makes these cookies sweeter.  These are my helpers Dillon and Thomas. Of course Dillon is interested in actually making the cookies and my little one is licking chocolate off of his fingers.  (He gets that from me!)


At least Thomas got excited to help eventually!


Please note that I was right beside them the entire time - terrified of both the mess and the potential disasters!


I mentioned earlier that the only difficult part about making these cookies is being sure that the chocolate mixture comes to a ROLLING BOIL for EXACTLY 60 SECONDS.  My grandma used to have me stand next to the stove and watch the change in boil so that I could learn what it means to be a "rolling boil."  I thought about adding a video, but I'm fairly certain none of you want to watch chocolate come to a boil.  So . . .pictures.

Before the "rolling boil" . . .


At the "rolling boil" . . .


When the chocolate reaches a "rolling boil," the bubbles in the chocolate will roll from the outside of the bowl to the center.

When your chocolate reaches this boil, SET THE TIMER.  Seriously.  Without a timer or a watch, you will mess up these cookies.  Once 60 seconds passes, remove the chocolate from the heat and add the peanut butter.  Stir the peanut butter to combine.  Once the peanut butter is melted, stir in the vanilla and the oats.


Once combined, lay some parchment paper on the counter and spoon the cookies onto the paper.  You will now learn how well you timed the "rolling boil."  Again, too long and these cookies will be hard and inedible.  Too short and get out your spoons!


Boiled Cookies
2 cups sugar
1/2 cup milk
1/4 cup butter
1/4 cup cocoa
     *  Bring these ingredients to a rolling boil slowly, stirring constantly, and keep at a boil for 1 minute.  Then remove from heat.
Once removed from the heat, add: 
1/2 cup peanut butter
1 Tbsp vanilla
3 cups oatmeal (can be old fashioned or quick)

* Optional additions after removing from heat are adding 1/2 cup nuts or 1/2 cup coconut.
* MMMMM....  Or just use extra crunchy peanut butter and make sure the 1/2 cup is heaping!


Ok.  Could someone please come get these cookies out of my house?!

Wednesday, July 13, 2016

No Mixer Required.

For Christmas my parents bought me the most AMAZING mixer and I was excited to start writing this blog. See...


It's Awesome!!  But it had some problems and, seven months later, it's still dead.


So I thought about sharing something other than baking like these crazy bleu cheese and bacon stuffed burgers,


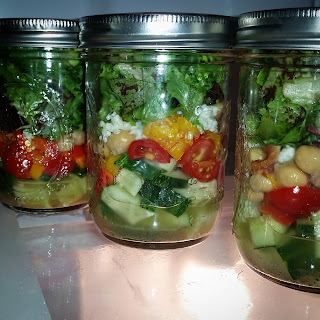
these refreshing jar salads made mostly with local produce and using homemade dressing,


or this mouth watering slow cooked pork ramen.


But this is a baking blog.  So Thomas (the most amazing 5 year old ever) and I are going to make brownies.  No mixer required.  I started baking with my dad when I was a little girl.  The first job I remember him handing off to me was creaming the butter and sugar for Toll House chocolate cookies - by hand.  Thanks Dad!   In addition to those grueling cookies, we often made the 1974 Joy of Cooking version of pancakes, and Baker's Baking Chocolate One Bowl Brownies.  These brownies taste like home to me.  They are rich and fudgey just the way a brownie should be.  Also, one bowl!!!  (Unless you're a terrible egg cracker... then two bowls!)

So let's talk about simple, fudgey, chewy brownies:

Hint one:  Don't skimp on your ingredients!
Inferior chocolate provides inferior chocolate flavor. That being said, for an easily accessible chocolate, the unsweetened Baker's Chocolate that you find in almost any grocery store baking aisle will be just fine.


Hint Two:  Don't burn the chocolate!
The Baker's one bowl brownie recipe allows you to melt the butter and chocolate in the microwave. Be careful if you do this!!!  Only microwave it for 30 seconds at a time and stir with each break.  The second there are no chunks of chocolate, take it out of the microwave and let it cool.  Personally, I suggest putting a pot of water on the stove and putting your heatproof glass bowl right on the water to melt the chocolate and butter.  This way you're constantly stirring it, you have to pay attention to it, and you're less likely to burn it.


Hint Three:  Don't scramble the eggs!
When your chocolate and butter are melted, remove the bowl from the heat source and let that stuff cool.  How gross would it be to crack eggs into it and have them scramble and get all chunky?!  Ew!


Once cooled, add the sugar, vanilla, and salt.  Fold them into the chocolate.


Next add the eggs and stir.  Notice that my eggs are not cooking in this picture?!  Let the chocolate cool!  (If you are bad at cracking eggs it is at this point you might want to break out that second bowl.)


Finally, fold in the flour.


Batter up!!  All finished.


Hint Four:  Cook the brownies all the way!
They will start to smell amazing several minutes before they're finished.  Don't open the oven!  You can turn the oven light on and stare, but leave them alone.  Check them after 30 minutes.

(And make sure you have more than two toothpicks.  Oops!!)


Your toothpick, after being inserted into the center of the brownies, should come out completely clean.  I repeat, there should be no chocolate on the toothpick!!  Under cooked brownies sound delicious, but they stay together poorly - these brownies are just as fudgey and chewy when completely cooked.  I promise.  Once you get a clean toothpick, remove the brownies from the oven and set somewhere to cool.  

This is the hardest part:

Hint Five:  Let the brownies cool completely!  
I mean it.  Walk away from the chocolate.  Do NOT be like me and pick at the tops of the brownies. Just walk away!  

Once the brownies are cool, you should be able to carefully lift the parchment paper out of the pan with the brownies in tact.  Then cut and enjoy! 


My dad and I used to sift powdered sugar over the brownies... I highly recommend this.  (I recommend adding nuts too, but that's personal preference.)


One Bowl Brownies

4 oz unsweet chocolate
¾ cup (1 ½ sticks) butter
2 cups sugar
1 tsp vanilla
¼ tsp salt (or just a pinch!)
3 eggs at room temperature
1 cup flour
1 cup chopped pecans or walnuts (optional)

Preheat the oven to 350°.  Grease a 13 x 9” baking pan and line it with parchment paper.  Grease the lined pan.  Put chocolate and butter in double boiler and stir until melted.  (Alternatively, microwave chocolate and butter for 2 minutes or until completely melted, stirring every 20 seconds.)  Stir until chocolate is melted, remove from heat source, and let cool.  Sir in the sugar, vanilla, and salt.  Stir in the eggs.  Add flour and nuts.  Mix well.

Bake 30 – 35 minutes or until toothpick inserted in center comes out clean.


HAPPY BAKING!!